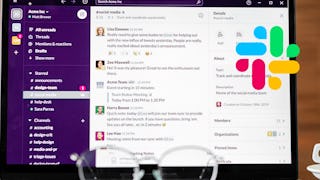
Have you ever felt that email is too formal when working with a team for a long time. Yet Whatsapp is unprofessional and disorganized? In this guided project, we’ll be using Slack to create an organizational workspace for a team collaboration.

Enjoy unlimited growth with a year of Coursera Plus for $199 (regularly $399). Save now.

Recommended experience
What you'll learn
Create a workspace to communicate and collaborate as a team
Learn how to add channels and include team members inside of them
Be able to upload or attach documents in an organized method
Skills you'll practice
Details to know

Add to your LinkedIn profile
Only available on desktop
See how employees at top companies are mastering in-demand skills

Learn, practice, and apply job-ready skills in less than 2 hours
- Receive training from industry experts
- Gain hands-on experience solving real-world job tasks
- Build confidence using the latest tools and technologies

About this Guided Project
Learn step-by-step
In a video that plays in a split-screen with your work area, your instructor will walk you through these steps:
Create an account and workspace on Slack. (7 min)
Add and control channels. Customize your workspace. (7 min)
Create a post inside a channel and connect to another software (OneDrive). (7 min)
Optional: Practice Activity (4 min)
Create a reminder, initiate a team chat and begin a discussion. (6 min)
Upload a document and add a bookmark onto a channel. (7 min)
Optional: Capstone (8 min)
Recommended experience
Access to OneDrive
Familiar with other communication softwares such as WhatsApp or Google Teams
Previous experience working in a team project
7 project images
Instructor

Offered by
How you'll learn
Skill-based, hands-on learning
Practice new skills by completing job-related tasks.
Expert guidance
Follow along with pre-recorded videos from experts using a unique side-by-side interface.
No downloads or installation required
Access the tools and resources you need in a pre-configured cloud workspace.
Available only on desktop
This Guided Project is designed for laptops or desktop computers with a reliable Internet connection, not mobile devices.
Why people choose Coursera for their career


You might also like

Open new doors with Coursera Plus
Unlimited access to 10,000+ world-class courses, hands-on projects, and job-ready certificate programs - all included in your subscription
Advance your career with an online degree
Earn a degree from world-class universities - 100% online
Join over 3,400 global companies that choose Coursera for Business
Upskill your employees to excel in the digital economy
Frequently asked questions
By purchasing a Guided Project, you'll get everything you need to complete the Guided Project including access to a cloud desktop workspace through your web browser that contains the files and software you need to get started, plus step-by-step video instruction from a subject matter expert.
Because your workspace contains a cloud desktop that is sized for a laptop or desktop computer, Guided Projects are not available on your mobile device.
Guided Project instructors are subject matter experts who have experience in the skill, tool or domain of their project and are passionate about sharing their knowledge to impact millions of learners around the world.


